Georeferencing with AutoCAD Civil 3D
February 2019, «Computer Aided Drafting for Mapping Applications II» at Centre of Geographic Sciences
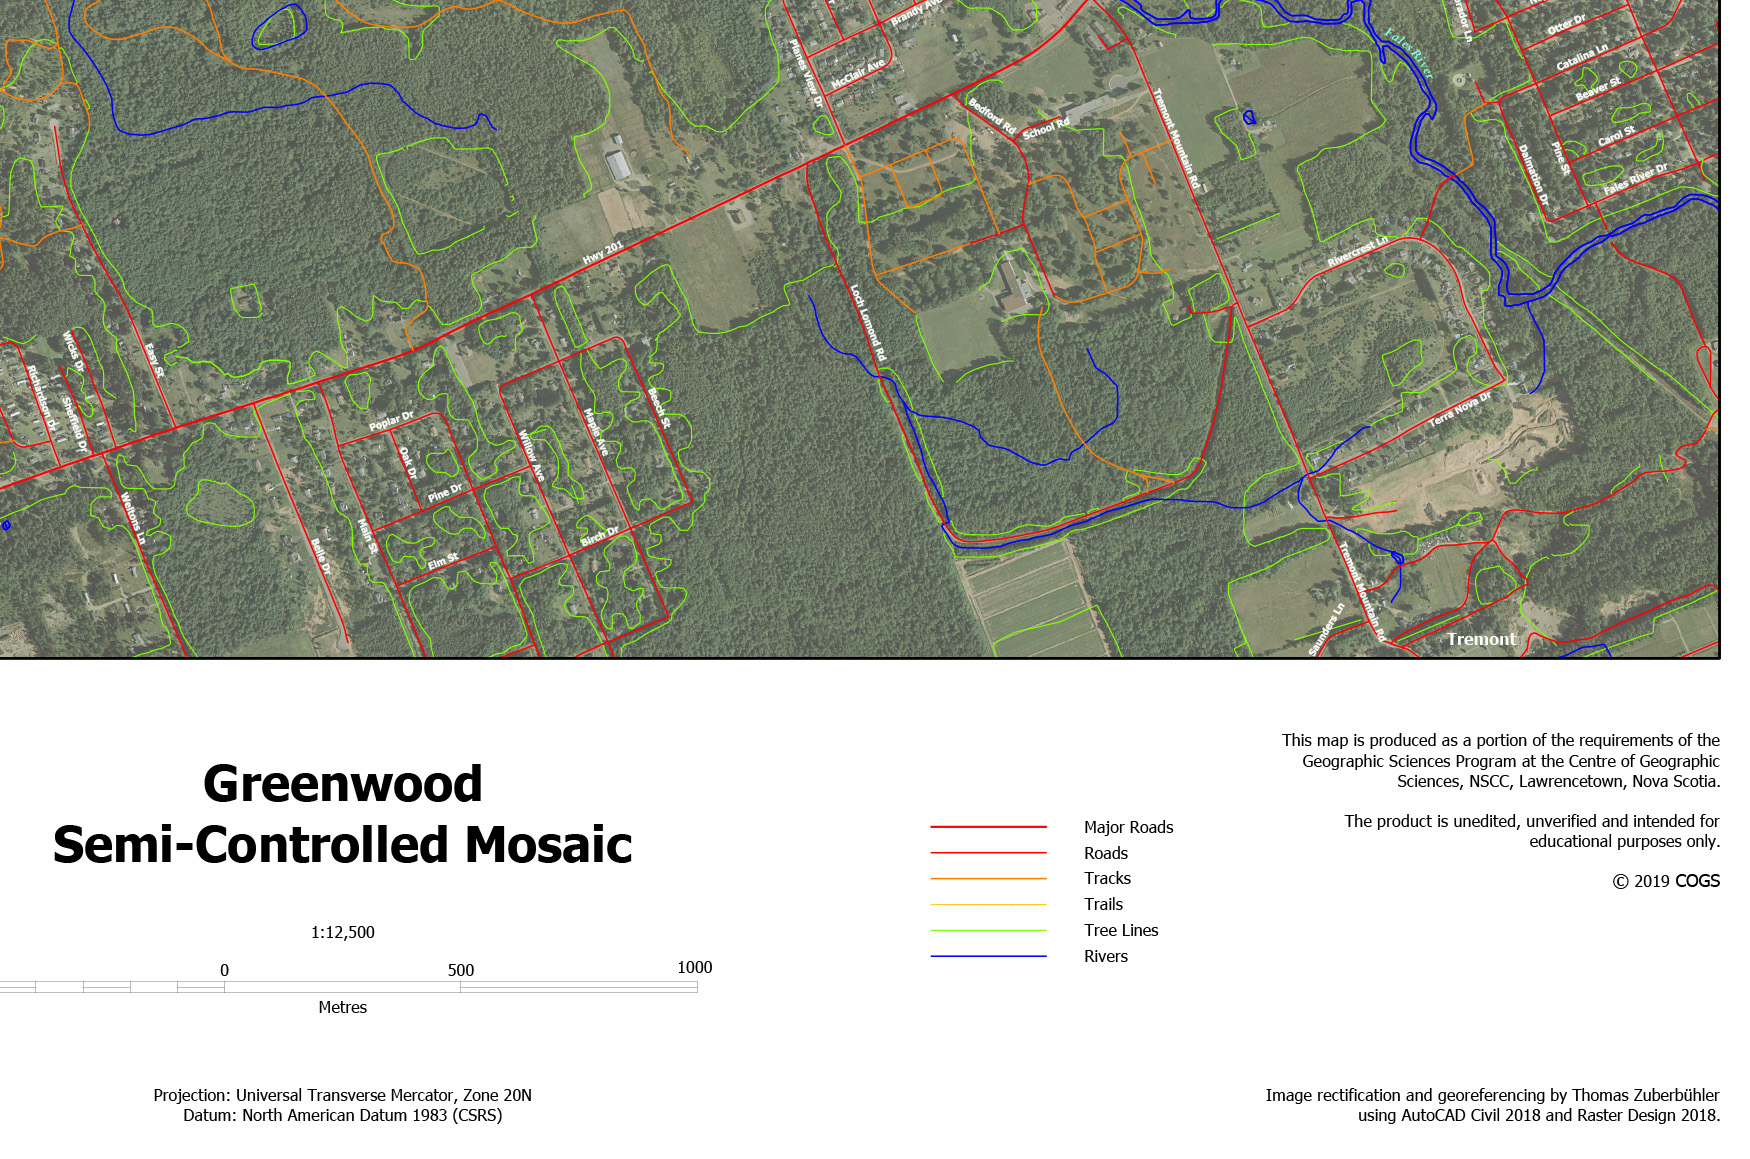
Provided with 4 orthophotos (Nova Scotia Geomatics Centre (NSGC)) and a DFX file with streets and rivers (from GeoNOVA Data Locator, NSGC), this assignment's goal was to rectify and georeference those orthophotos with AutoCAD Civil 3D 2018 and AutoCAD Raster Design 2018.
Georeferencing
After the coordinating system was set, the DFX file was added as a block to AutoCAD Civil 3D. Then, a layer for each photo was created and the first photo was added using the Raster Tools. Next, the first two control points were set, followed by more control points and the selection of an appropriate transformation. Finally, the rectified and georeferenced image was saved as a TIF file along with a world file.
Creating the Mosaic
Through analyzing the orthophotos, crop lines were drawn. Those crop lines were critical. If not chosen carefully, crop lines are plainly visible in the final mosaic. That said, crop lines should go along tree lines, field boundaries, street curbs and rivers. Then, the photos were cropped along those crop lines and merged to one photo, the final mosaic.
Software, Technology, Data Sources and Skills
- AutoCAD Civil 3D 2018
- AutoCAD Raster Design 2018
- Working with layouts
- Mapping related Technics:
- Creating Mosaics with AutoCAD
- Georeferencing Orthophotos
- Labeling in AutoCAD